Last updated on October 30th, 2023 at 07:34 am
In essence, OST files are the offline versions from Outlook. They are the offline copies of your Outlook mailbox. They store all your email messages and attachments, contacts, events and so on. within Outlook in order that, even when you’re not connected to any network, you will have access to everything. This is an amazing function of Outlook.
In some situations there is an OST file and want to transfer or move it into MS Outlook. It’s better to convert it to PST format in order to facilitate the process. However, you aren’t sure how to accomplish this? Don’t worry In this article, we will go over some of the main reasons for users to move OST files, and the possible ways to accomplish this. Continue following for more information.
Few reasons to consider moving OST files to MS Outlook
Users might be required to transfer an OST document to Outlook to fulfill a wide range of reasons. We’ve categorize some of the most popular reasons that users need to transfer their OST documents. Explore the different motives.
- If an Exchange server suddenly crashes the data will be impossible to access, and in this circumstance, there’s an opportunity for massive loss of information. In order to keep full rights to the crucial database the OST file has to be loaded into Outlook.
- To prevent data loss due to the accidental destruction of mailboxes offline you must transfer OST to Outlook.
- It is also required in the event that you want to transfer Outlook across computers.
- Since you OST document is stored on the server, you could lose your Outlook pertinent information if the server goes down, crashes, down for maintenance or gets infected by viruses on computers. It is highly recommended that you back up your Outlook documents prior to attempting to move them into Outlook or to convert them into PST format.
Before starting, do you know where your OST file is located?
A majority Outlook users are familiar with a knowledge about OST files, however we’re sure that the majority users are unaware about where they can find your OST files. However, if you’re using Outlook versions from 2010 to 2019, then you should follow the following steps to determine the location of your OST.
- Access your Outlook program, then reach for the “File” tab.
- Click upon the “Account Settings” button from the “info” section..
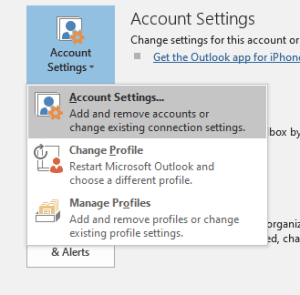
- Designate your most recent document account from the Data Files menu, and afterward press “Open File Location.”
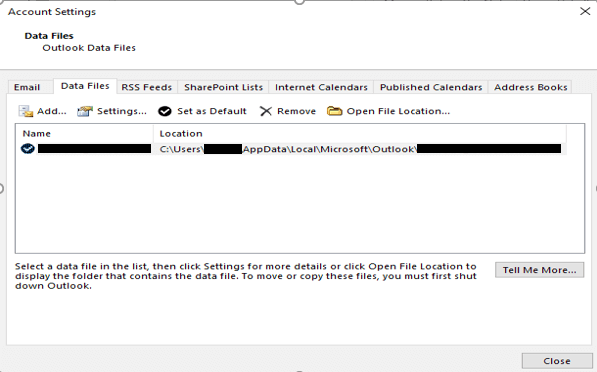
- A wizard will appear with the predefined destination of your OST file displayed.
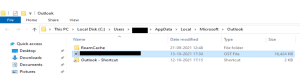
By doing this you will know where to find the OST file’s place of storage. Be aware the steps above are correct for Outlook versions that run from 2010 to 2019. If you’re using any different (latest or the earliest) version, the steps may differ.
Methods to migrate OST to PST file
If you’re ready to apply your knowledge and experience, then we believe manual methods can be the better choice for you, without having to spend only a few dollars. There are, of course a variety of methods that are manual, but they work. Check them out below; we have provided step-by step instructions.
Related Blog: How to Import OST to Outlook.com Account
Use the Import/Export option in Outlook
The “Import and Export” page is the default Outlook software for transferring Outlook texts, contact information, schedule items, activities, and remarks from one device to another.
- Access the Outlook client and select the “File” tab.
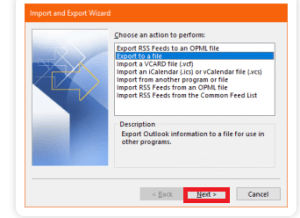
- Afterward, under “Open & Export,” select “Import & Export.”
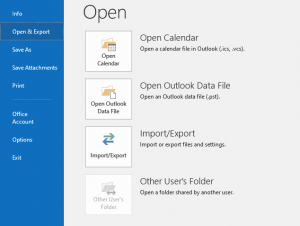
- Tab the “Next” icon after choosing the “Export to a file” choice.
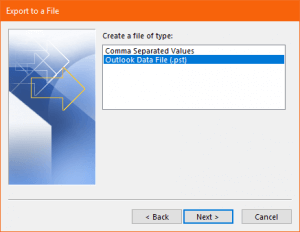
- Tap “Next” after selecting the “Outlook Data File (.pst)” option.
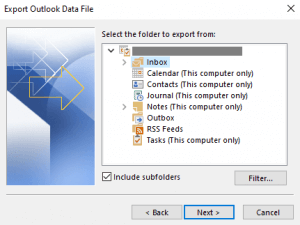
- Pick the directory in which your OST files are stored from the choices, after which tap “Next.”
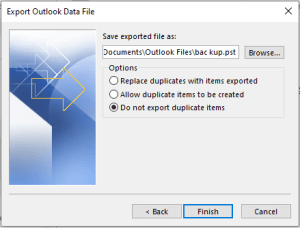
- Specify the directory in which you desire to preserve the documents and identify the correct choices for overwriting items before clicking the “Finish” button.
- Insert a passcode if you really would like to prevent unauthorized access. If you frequently forget your passcodes, try saving these passcodes in your passcode list.
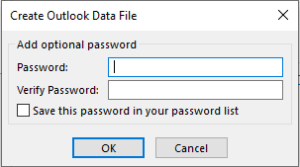
If you enter a strong password but do not check the “save this password” choice, you will be prompted to do so if you forget the password. You will not be able to obtain that data anymore. Keep that in mind.
Use the archive function
- Log in to your Microsoft Outlook user account.
- Navigate to the ‘File’ tab.
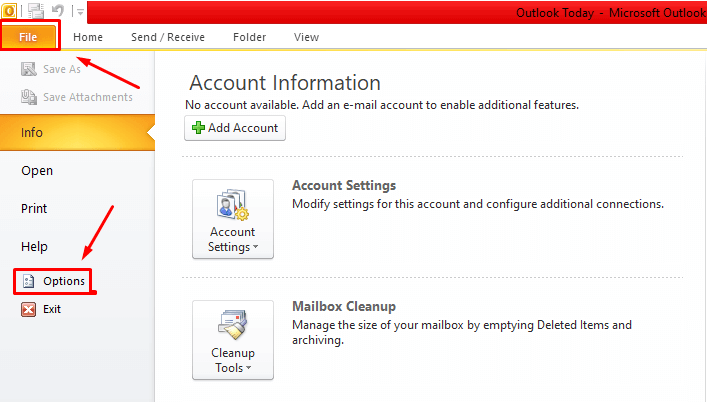
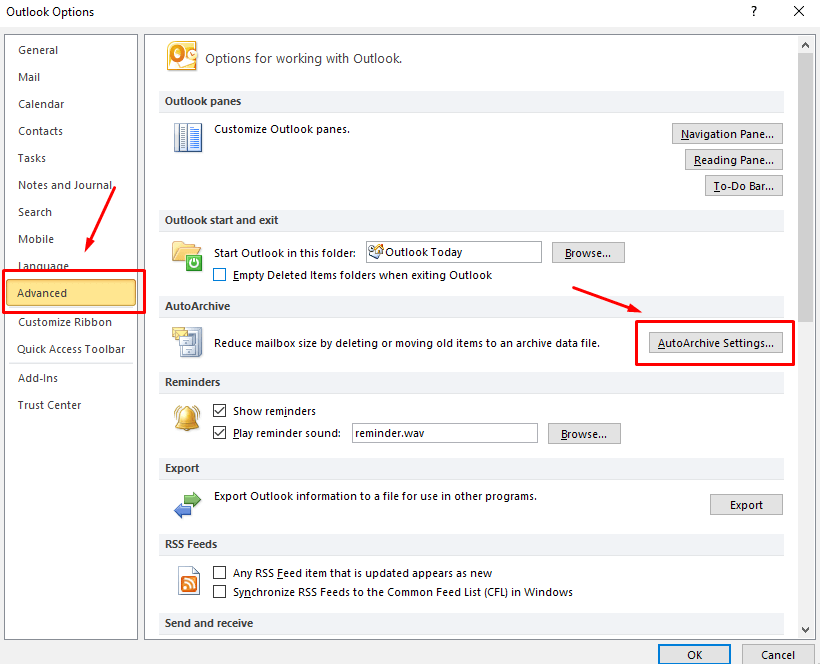
- Then, select “Options” and then the “Advanced” tab.
- Select “Auto Archive Settings.”
- Browse to the destination where you want to preserve the archived documents.
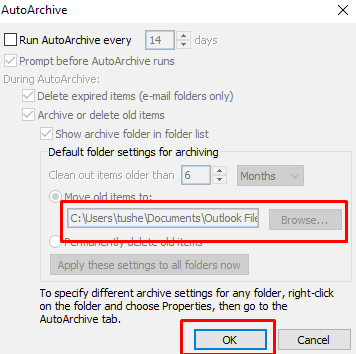
- Then, press the “OK” icon.
This manual technique most of the time fails and causes users’ data loss. Therefore, we are notifying you to keep a backup to prevent any loss.
Migrate OST files into MS Outlook in a professional manner
As we have said before, OST files are the offline replicas of Outlook mailboxes. Actually, Outlook uses PST files to store all its mailboxes for compatibility with online use. So, without wasting any time on manual approaches, we can convert OST files with a professional OST to PST Converter tool.
As a consequence, our OST files will be easily migrated to MS Outlook, which is quite easy, quick and more reliable than the manual approaches. Besides, you don’t need any technical expertise at all to perform OST Recovery as well as conversion through a tool.