
Generally, MS Exchange stores its database offline files in OST format. Sometimes, due to system failure, any hardware or software-related issues, or for backup purposes, users prefer to export their Exchange server OST files to Outlook PST format.
But as a technically inexperienced person, you may not be aware of how to export OST files from Exchange and import them into Outlook. Basically, there are several methods to do that. In this article, we will describe the effective techniques. Stay tuned!
First, we will walk through some manual techniques. You should try at least one of these manual approaches before using any OST to PST converter tool. If you somehow didn’t get the fixes with manual techniques, you should then think about any professional solutions (it can be a tool or any local service center).
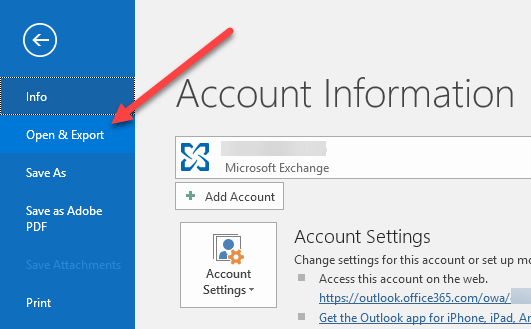
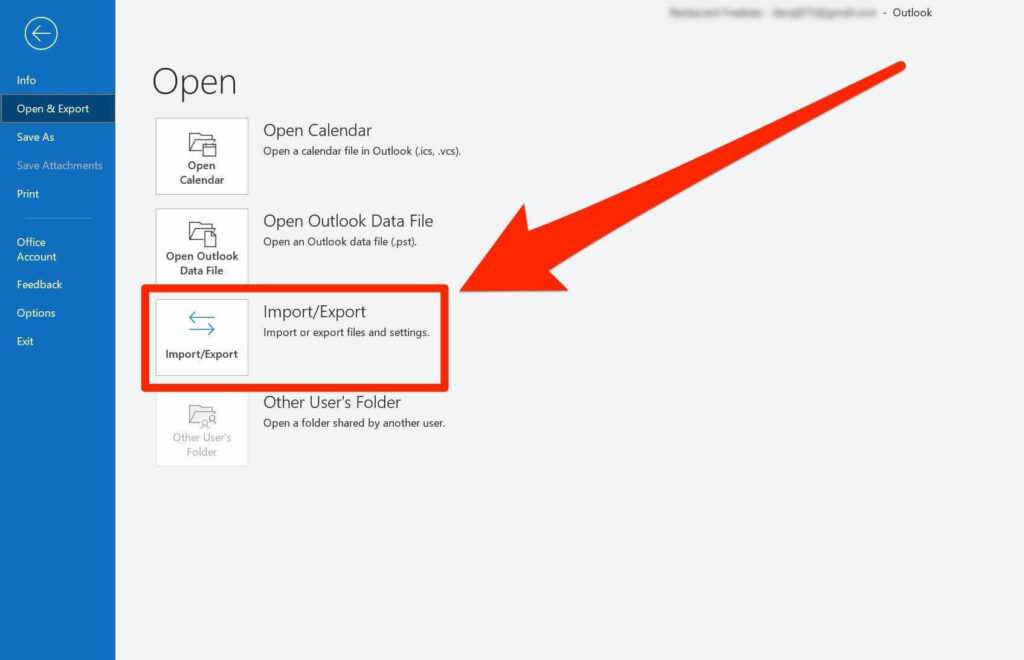
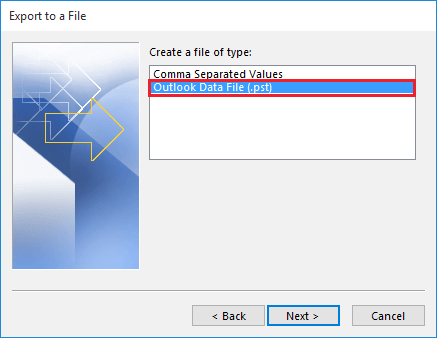
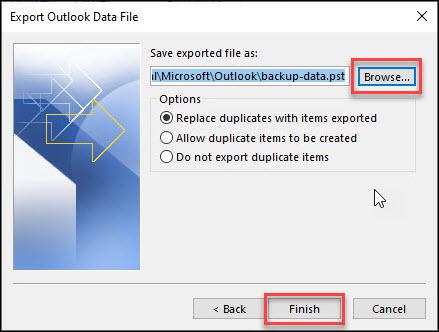
By using Outlook’s “Import or Export” feature, you can export documents from an offline OST document to a PST format file. It will also allow you to save the exported information in CSV (comma-separate) and Excel formats. To do so, use the methods outlined below.

If the exchange and OST are properly synched, this strategy will work. If you are having trouble exporting Exchange Server Offline Database OST format files to Outlook PST using traditional techniques, seek the assistance of an expert.
We think it’s the easiest technique as well as semi-effective too. It’s yet another method for transferring mailboxes from an OST database to some other file formats. Below are the required workgrouds:
Actually, there are some things that you can’t directly export through dragging. This includes that you cannot drag Inbox, Contacts, or other predefined directories into a.pst file using this technique. As a result, you must duplicate all of these directories from OST documents to PST file formats.
Outlook’s database archive feature can be used to transfer mailboxes to a PST document. However, this technique of exporting mailboxes does not allow for the archiving of contact details. The following are the implied connections with this process:
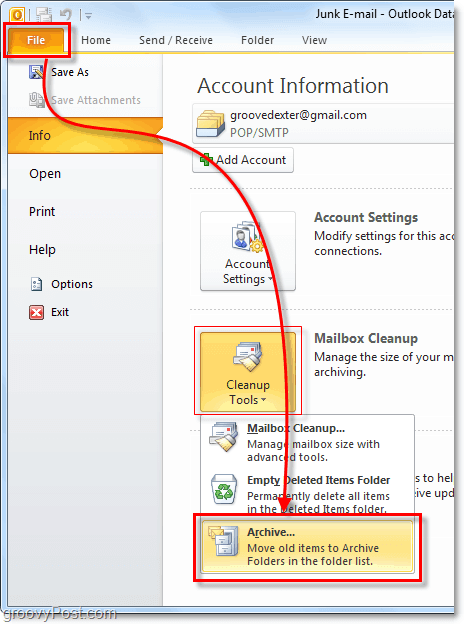
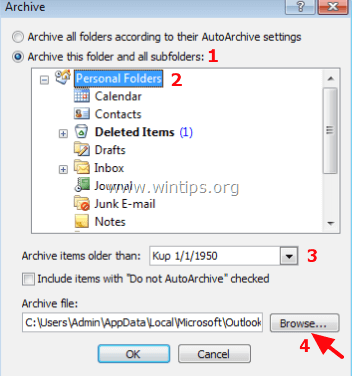
The above technique exports objects from an OST document to PST file types, but it does not include contact details.
One of the simplest ways to repair corrupt OST files and export OST objects to PST format is to use the OST Converter tool. If the traditional methods do not work for you or if you are unable to perform them individually, you can use any OST to PST conversion tool.You can use this to export both password-protected and maneuverable OST files.
Actually, utilizing tools is a quick and easy way to convert OST files to PST files without having to go through a long and drawn-out process.
You don’t really need to do anything if you’re utilizing a professional tool; simply download and setup it on your device, and the majority of the work will be taken care of unilaterally. Professional tools are simple to use; maybe non-technical users can use them without difficulty. So there’s no need for anyone’s assistance.


%20to%20Outlook%20(PST))